1) install Ephox application on to your server if its not already installed
you can download ephox edit live from
http://ephox.com/download
download Ephoxeditlive for wcm. version.
login to Websphere Application Server Administration Console
Navigate to Applications->Application Types -> Websphere enterprise applications
click on Install and select the ear file you downloaded and click next
keep the default options keep going to next pages.
make sure you select websphere_Portal as the server not server1 while installing the ear and finish the installation and save the configuration.
start the application if its not already started.
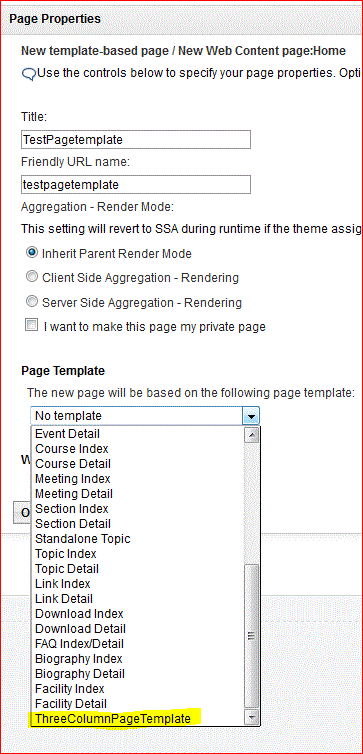
2) specifiy the editlivejavaeditor.jsp in wcm
now Login to portal as administrator and nagive to wcm autoring portlet -> click on prefernces and click configure.
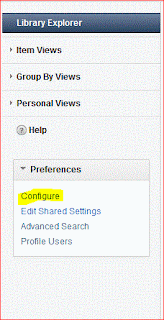
Expand the RichTextOptions section , select Custom Editor in the dropdown and enter the following in the text box "/wps/ephox/;jsp/html/EditLiveJavaEditor.jsp"
and click OK.
then click on editSharedSettings ,
Expand the RichTextOptions section , select Custom Editor in the dropdown and enter the following in the text box "/wps/ephox/;jsp/html/EditLiveJavaEditor.jsp"
and click OK.
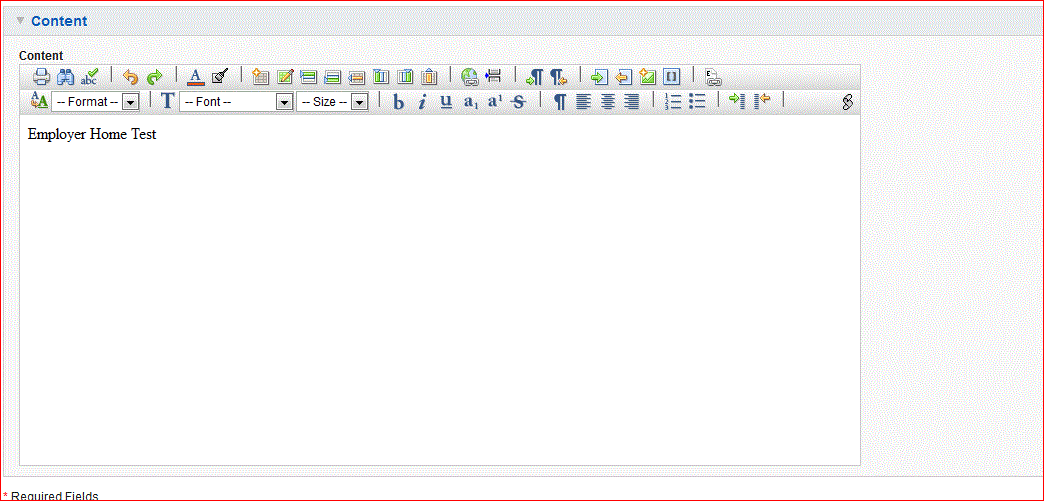
now go to any content item that uses rich text and you can see its using ephoxlive edit instead of IBMs default RTE. you can see the difference in the below images.
you can toggle between the design view and code view in the bottom left corner.
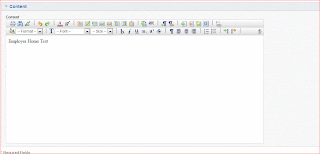 IBMs default RTE
 Ephox editlive
 ephox editlive
you can download ephox edit live from
http://ephox.com/download
download Ephoxeditlive for wcm. version.
login to Websphere Application Server Administration Console
Navigate to Applications->Application Types -> Websphere enterprise applications
click on Install and select the ear file you downloaded and click next
keep the default options keep going to next pages.
make sure you select websphere_Portal as the server not server1 while installing the ear and finish the installation and save the configuration.
start the application if its not already started.
2) specifiy the editlivejavaeditor.jsp in wcm
now Login to portal as administrator and nagive to wcm autoring portlet -> click on prefernces and click configure.

Expand the RichTextOptions section , select Custom Editor in the dropdown and enter the following in the text box "/wps/ephox/;jsp/html/EditLiveJavaEditor.jsp"
and click OK.
then click on editSharedSettings ,
Expand the RichTextOptions section , select Custom Editor in the dropdown and enter the following in the text box "/wps/ephox/;jsp/html/EditLiveJavaEditor.jsp"
and click OK.
now go to any content item that uses rich text and you can see its using ephoxlive edit instead of IBMs default RTE. you can see the difference in the below images.
you can toggle between the design view and code view in the bottom left corner.
 IBMs default RTE
 Ephox editlive
  ephox editlive